Sunday, November 18, 2012

Holiday Favorites - Nail Polish Edition

A large part of the holiday season for me is color. You see it in the Thanksgiving meal you'll be munching down on in a few days - cranberry reds, golden browns, and bright whites. It pops up again as we enter winter in the twinkling lights strung up on the trees outside, the warm colors in the house as you cozy up by the fire with a cup of tea, and the bangles and glow of New Years Eve.

Being me, one of my favorite ways to see holiday color is on the nails. Here are my top 10 holiday nail polishes broken down evenly into base colors and glitter polishes. I'm not a huge fan of glitter polish during the year, but the holiday season is when you should pull out all the stops.

Bring in the Base...


 Sinful Colors - Under 18 


 Perfect for the Christmas season, this is a shimmery red-orange color. It is the only base color that I'd recommend three solid coats, but is totally worth it once dry. The best part - you can find it at Walgreens for $1.99!

 O.P.I. - Casino Royale 


 From the new Skyfall collection, Casino Royale reminds me of cozy sweaters. It falls somewhere between cranberry and merlot and is perfectly flat (no shimmer, glitter, or any of that jazz).

Butter London - British Racing Green


 This is by far my ultimate favorite color this season. This deep green has the tiniest flecks of shimmer that show up in the bottle as silver, but when applied to then nail only reflect the light - it's pretty awesome. Stay tuned for a holiday nail tutorial with this color coming soon!

Essie - Bobbing for Baubles 


 Bobbing for Baubles is from the Essie 2011 Winter Collection and is a deep navy blue - almost black. It's a great flat neutral with a little hint of fun. Perfect for any winter day.

O.P.I. - Moonraker 


Moonraker shows up much darker in the bottle than it does on the nail. It's a great silvery-gray with little specs of silver shimmer making it look metallic. My only problem with this color is that it can be a bit watery and needs a little bit of a careful application to make sure it doesn't come out streaky. That being said, the color payoff is totally worth the extra time. 


And onto the Glitter! 


 Milani - Jewel FX Lavender 


This glitter polish, like the rest of the Milani glitters to follow, are a colored glitter floating in a clear base making them a perfect top coat or a blinged out accent nail when built up. Lavender is made up of larger hexagonal glitter pieces and smaller round pieces, but all reflect the light brilliantly.

Milani - Red 


Like its friend above, Red's glitter floats in clear polish making it very multi-purpose. Unlike its friend above, Red is only made up of large, hexagonal pieces of glitter that are much easier to build up on their own and can cover your nail almost completely in three coats. Awesome.

Milani - Gold


Not much more to say about Milani polishes at this point, but this gold color is amazing. It is my favorite glitter polish this season as I am loving metallics in general. This will also be showing up in a tutorial soon - stay tuned!

Orly - Mermaid Tale 


Mermaid Tale comes from the new Orly Flash Glam FX collection that they are beginning to release. It's a mix of different sized pieces of glitter that are green, silver, and slightly blue-toned making the color very multi-dimensional.

O.P.I. - Designer...de Better! 


This O.P.I. color comes from last year's holiday Muppet collection. It caught my eye as it falls somewhere between glitter and shimmer. It can totally hold its own as the glitter is suspended in a gold polish. The glitter itself is silver, gold, and rose gold making the overall color of the polish change depending on the lighting. I absolutely love this color!


Although these are my favorite holiday colors for the 2012 season, I have yet to fully explore the individual holiday collections released by each of the brands. So far, the China Glaze Holiday Joy collection seems to be the most interesting I've seen. 

Tuesday, November 6, 2012

Homemade Trivet

While browsing Pinterest last week, I came across a river stone trivet from vivaterra.com. With crafts on the mind, I decided to try and make my own. So, off I went to Michael's Craft Store to purchase the necessary items. 

You will need: felt in a color of your choosing (I got two colors, just because), stones of your chosen size, needle & thread, scissors, craft glue, and a pen - and obviously a glass of wine. 


I traced the outline of a standard pot onto both colors of felt to create an outline for the design and cut them out. You want to use two pieces of felt even if you use two of the same color. The glue comes through the first layer just a bit so the second layer helps it look a little nicer.


I sewed the two pieces of felt together with thread that matched the cranberry color felt, as that was going to be my top side, and cut off the extra felt around the edges. In this step, I found out just how lacking my sewing skills were. So, if you think you can't do this because you don't know how to sew - I promise you it will be okay! 


Next, I picked out all of the flat (or relatively flat) stones from the bag I purchased. I ended up getting two bags just in case and I'm glad I did. There were not enough in the first bag so I had to dig a few extras out of the second. I set aside some of the smaller stones for places that needed to be filled in after all of the larger stones were used. 


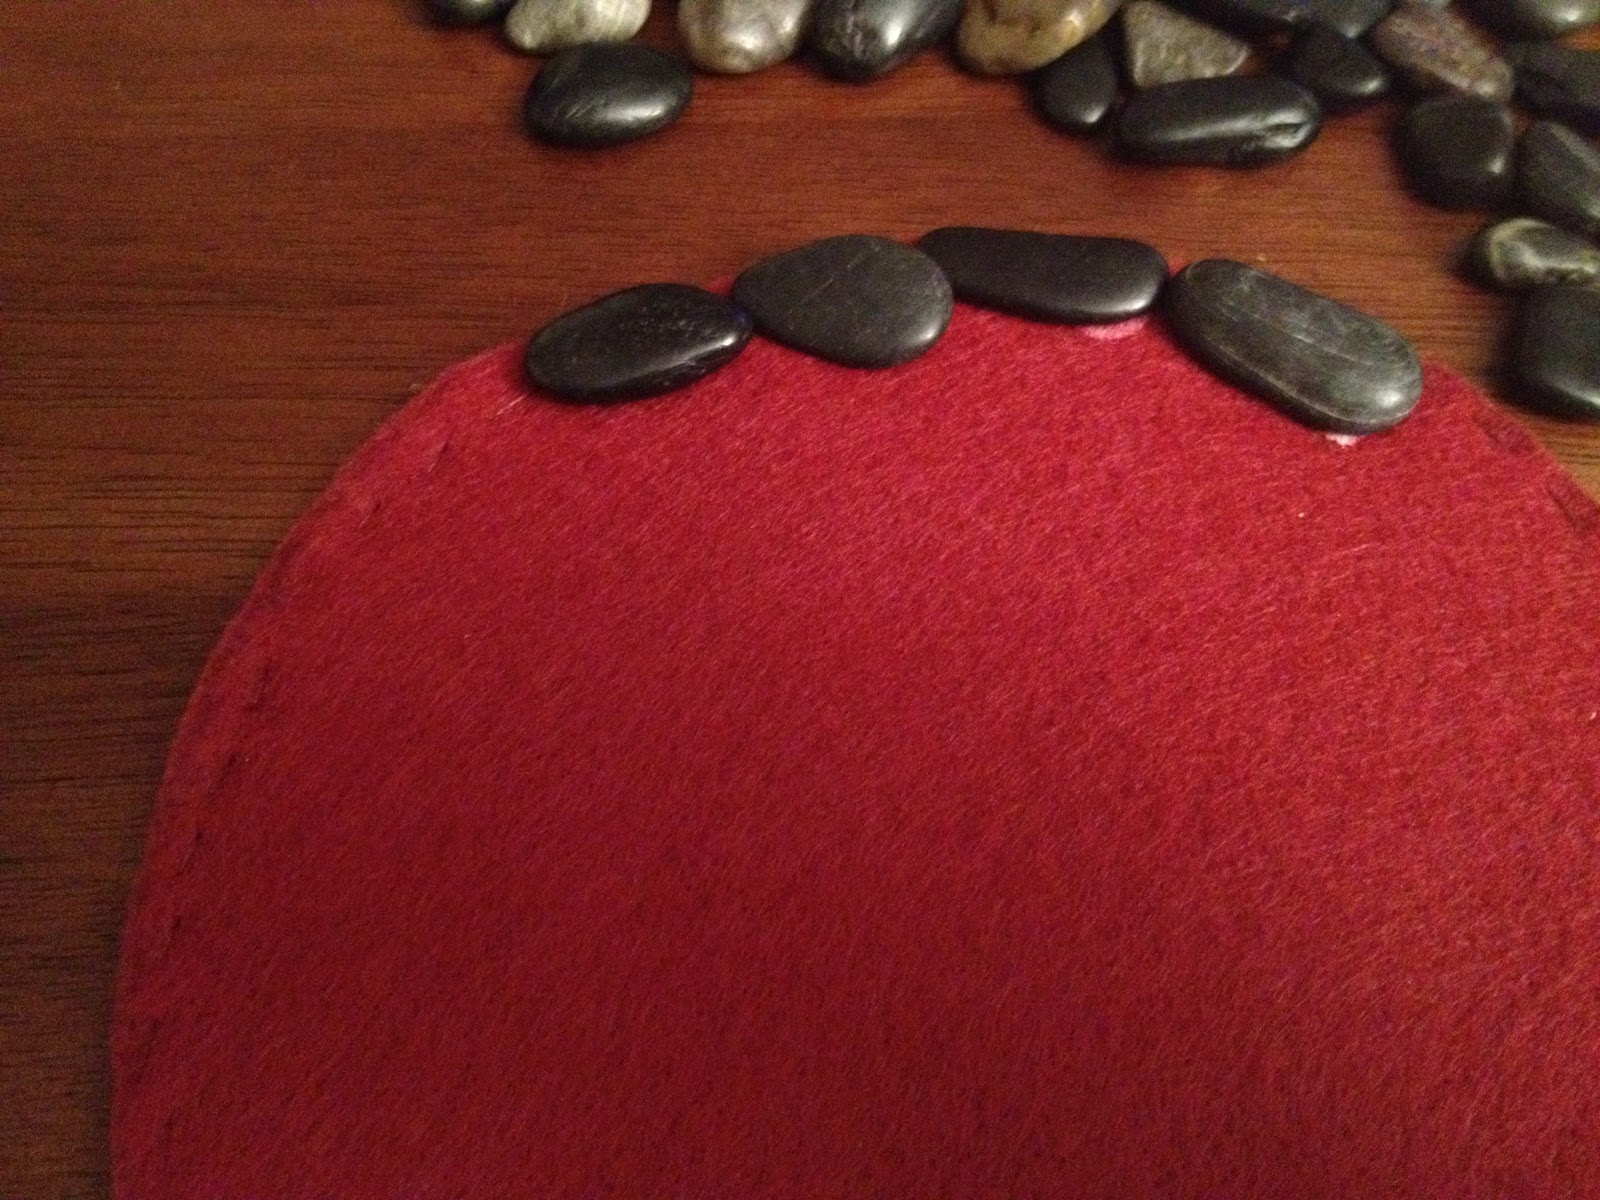
I started by creating an edge with the largest of the stones and worked my way in using a circular pattern, but you can use whatever pattern or lack of pattern that you'd like. It's okay if a little bit of the glue is showing because once it dries, it is clear. 


Just a note on the glue situation: 
As I have never done something like this before, there was quite a bit of trial and error - especially when it came to the glue. I ended up getting hot glue, rubber cement, and super glue before settling on the standard "craft" glue. All types of glue before the craft glue were wildly unsuccessful in getting the stones to stick to the felt. I did manage to get my fingers stuck together for a hot minute with the super glue though - I'd advise using gloves or something of the like when you are an amateur glue-er like myself.


Once you have finished gluing all of the stones to the felt, let it dry overnight before moving it. Your finished product will look like this: 


After the trivet had dried, I decided that I should have placed a piece of cardboard or something similar between the two pieces of felt. The trivet is quite top heavy, as you can imagine, and I think the cardboard will help it last longer. I will be cutting mine open and sliding a piece of cardboard inside. 

Overall, this is a really cheap and easy craft that produces something quite useful. Thumbs up for trying something new :) 

Wednesday, October 31, 2012

October Favorites '12

I realize that I very recently wrote about some of my fall favorite in my "I <3 Fall" post, however, I have been watching "Monthly Favorite" videos on Youtube for quite a while now (2+ years) and decided to translate mine into blog form. 

"Monthly Favorite" posts are a random list of items you tried for the first time during the month and really enjoyed. They are usually centered around a specific topic like 'beauty products', but I am just going to hit on things I genuinely liked in the month of October as I am not an expert on beauty related things. That said - a few beauty products may pop up :) 

Without further adieu: 

Maybelline New York Eye Studio Gel Liner in Charcoal 


I re-organized my make up a few weeks ago and re-discovered this little gem. It works great when applied with an eye liner brush. I place it as close to my upper lash line as I can get and then use my finger to smudge it slightly to give a very light smokey eye effect. 


Pumpkin EVERYTHING 


Pumpkin is a theme throughout fall, but more specifically October. Carving, eating, roasting the seeds - I've lightly participated in each of these activities this month and it was awesome. Here is a photo of some of my friends carving pumpkins at a Halloween party last weekend. 


Pink Pearl Stud Earrings 


I think I have worn these earrings every single day this month. I am generally a huge fan of white pearl studs, but these give the look a little twist. Since they are light pink they basically match just about everything I own and add just a bit of flare while still looking classic. 


Taylor Swift: Red 


Why yes, I do have the musical taste of a 16 year old girl. Only half the time, I promise. Really loving this album this month even though it only came out about a week and a half ago. Specifically two songs: 'I Knew You Were Trouble' and 'I Almost Do'. Check it out. 


Leopard Print Scarf 


I got this at Target when I was home visiting my family in September, but the weather really didn't get cool enough in the city until October. I've been wearing this quite a lot as it's neutral and can be paired with a lot of different outfits. In my mind, this is really the only way we are meant to pull off animal print. 


Brown Boots from Akira Shoes 


I also purchased these back in September, but I didn't start wearing them until about 3 weeks ago. They took a bit to break in, but now they are super comfortable and the leather is really soft. Also really loving the zipper.  


'Is Everyone Hanging Out Without Me? (And Other Concerns)' by Mindy Kaling 


Just started reading this book a few days ago for a break from some of the heartier books I've been reading recently. I'm about half-way through and it's hilarious. Not in a Chelsea Handler way - in a much more appropriate and relatable way. I deem this a wonderful bus book or for a break between more serious reads. Thumbs up. 

Happy October & Happy Halloween - Bring it on, November! 

Thursday, October 25, 2012

80 Bottles of Polish on the Wall...

...or in a very large container in my dresser. Yes, my friends, I have 80 individual colors in my nail polish collection. This does not include duplicates (colors I obviously loved so much I bought twice), base coats, top coats, or clear nail polish.

Some may say this is a problem (I go back and forth), but my roommate, Aravinda, put it nicely - if you have an obsession, blog about it. It makes it legit.

To better keep track of my colors and to really get a feel for what each of them looks like on the nail, I made colors wheels for each color family. It just might be the best idea I've had for my collection so far. Next - organization. I'm thinking spice racks? But, more on that later...

Brace yourselves and let's jump into the wonderful world of color!

Color Wheel #1: Neutral/Dark


This wheel ranges from nudes (very top) to deep, dark colors that look almost black, but in reality are deep purples, greens, and blues (right) to grays and browns (left). This palate is my most reached for this season. In the past, I didn't really enjoy fall colors and just kept the summer colors on my nails through the dreary fall and winter days. However, this season I've gone a bit "neutral crazy" and most of these colors are recent additions to my collection. 

Must Have: Essie "No More Film"


Color Wheel #2: Red & Purple


This wheel needs a little lovin'. Just like neutrals, I shied away from reds in the past because, frankly, I think they make my hands look old. I know, it's ridiculous. Nevertheless - I am just finding some red colors I really enjoy. So far, so good! As for purples, I initially love most of the purple colors I find, but when I test them out, many of them look the same. Every nail polish line has a "pastel purple" that looks identical to the next one and none of the brands are trying anything different with their purples. I'd love to see a purple with a hint of pink that doesn't make the polish look like a pre-teen girl should be wearing it. Come on, Essie! 

Must Have: Essie "Skirting The Issue"


Color Wheel #3: Blue & Green


I can honestly say that I didn't realize just how many green nail polishes I had until I decided to do the color wheels. Holy cow! I think I may have found my weakness. Shades of green can differ from minty  to Kermit to teal like the ocean and I love it all. You can wear green all year round and it definitely brings out a playfulness on your nails. On the other hand (no pun intended), blues are much harder to wear. Unless you've got a wonderful skin tone or are a bit sun-kissed, blues tend to make your hands look a little sickly. 

Must Have: Essie "Mojito Madness"


Color Wheel #4: Pink


The epitome of nail polish colors for me is pink. There are endless shades, anyone can wear them, and they are ever-so-feminine. Mine range from the palest of pinks - perfect for a simple french manicure - to hot pink like Barbie's dream car. No complaints in the pink department, there is not a pink I've found that I didn't love. 

Must Have: Essie "Fiji" 


Nail Wheel #5: Odd Balls 


This wheel is all of the random colors that didn't fit into another color family. Yellow, coral, silver, bronze, and glitter polishes. This is the "fun" wheel. Yellow is difficult because outside of Butter London's "Cheeky Chops", there really isn't a good creamy yellow color. I should also mention that Butter London polish goes for about $12 a bottle - insane, even for me. On the flip side, there are about a million and one wonderful glitter polishes ranging in color, glitter size & shape, and consistency. The glitter can float in a base color or in clear polish, but no matter the form, it's a bitch to take off. 

Must Have: Essie "Cute As A Button"


If you couldn't tell before - I have a love affair with Essie polish. Really, try it. Smoothest formula, never clumps, dries evenly, and the brush is the perfect width to paint on color in two easy strokes. I promise, this is not sponsored! 

Phew! We made it. Moral of the story - something special will happen when I eventually hit 100 (and I definitely will because I have discovered I'm missing entire color families). I'm not sure what, but probably a cake because there should always be cake. 

Monday, October 22, 2012

I Heart Fall

Hello lovely people. We are officially in the fall season and I'm enjoying every second of it. In the past, I wasn't crazy about fall, but this year it has taken me by storm and I can't get enough. My Pinterest boards are littered with sweaters and hearty breads and I can't seem to come up with an outfit that doesn't include a scarf and boots. 

Here are my top 6 fall favorites. 

1. Homemade pumpkin bread from Skinny Taste. Super dense, super pumpkin-y, super delicious.  


2. "Leaves" candle from Bath & Body Works. The perfect autumnal smell. 


 3. Free (yes, I said free) Minnetonka moccasins. 


 4. Tree line slowly turning from green to the yellows, reds, and oranges that epitomize this season.


5. The most perfect tree on my block. First to turn this year! 


6. Boots, scarf, trench coat, beats, leaves. 


Oh, and Thanksgiving. I can't freaking wait for Thanksgiving. 

Happy fall, y'all! 

Sunday, October 7, 2012

A Pop of Leopard


Continuing on with trying new nail products - I recently gave the Sally Hanson Salon Effects nail strips a shot.  


They come with everything you need and package the strips so that you don't have to use them all on the first try. 


 Since I chose such a bold design, I decided to go for a more trendy look and only use the strips on one nail on each hand. I just needed to find the perfect complimenting color for the other eight fingers...


 I ended up choosing the bottom color - Sinful Colors 'Nirvana'. It's the chocolate-y-est (yes, that is a word now) and blended well with the leopard print. I applied two even coats leaving my left ring finger and right pointer finger polish free including base coat. 

After my polish was completely dry, I opened up the strips. They can be a little tricky to work with, but they are real nail polish strips and look very natural on the nail. They feel exactly like painted polish once applied. 

Before you apply them they instruct you select the size strip you need for each nail - they recommend that slightly smaller is better than slightly larger, but I'd have to disagree. I used slightly larger ones and was able to clean up the sides to cover the entire nail as opposed to having bare nail on either side. I finished off with my go-to top coat and they were dry instantly. 

This is the finished look: 


I would absolutely recommend these nail strips for anyone who wants to play around with designs, doesn't have time to wait for their polish to dry, or for my fellow nail polish lovers who want to try something a little different.